Import contacts from a CSV file
Prepare, preview, validate, and import an approved contact file without exposing or duplicating resident data.
What you will finish
An approved CSV is mapped deliberately, checked for repeat-import and roster effects, and imported once.
Before you begin
A CSV is a simple table file. Imports can change many records at once, so work from an approved copy and use the preview before committing anything.
Have these ready
- An organization-approved CSV stored in an approved location
- A documented meaning for every column
- Confirmed property names and consent evidence
- Permission to import resident data
Stop and ask for help if
- The file contains columns you do not need or understand.
- The preview shows a real person in the wrong property, malformed phone numbers, missing consent evidence, or widespread duplicates.
- The file came from an unapproved message, personal drive, or unknown source.
Step-by-step instructions
- 1
Make a protected working copy
Keep the approved original unchanged. Store the working copy only where your organization permits resident data.
What you should see: You can return to the original if validation fails.
- 2
Open Import CSV
Go to Contacts, then select Import CSV and read the format and limit instructions.
What you should see: Roster source and CSV file controls appear.
- 3
Choose the roster and file
Select the correct Roster source and the approved CSV. Do not upload spreadsheets, screenshots, or unrelated exports.
What you should see: Preview the first rows shows the file name, row count, and sample rows.
- 4
Match columns
Under Basic matches, map the name, phone, property, and any approved optional fields. Leave unrelated columns unmapped.
What you should see: Each imported field comes from the intended source column.
- 5
Review Import check
Read Rows ready, Existing contacts to disable, Duplicate account IDs, and Properties seen. The roster sync can disable contacts from the same source that are absent or no longer current.
What you should see: You understand the exact roster effect before importing.
- 6
Confirm any disabling
If MercuryReach lists contacts to disable, stop unless that replacement effect is approved. Select the confirmation checkbox only after verifying the source is a current full roster.
What you should see: No active contact is disabled by surprise.
- 7
Import once
Only when mappings and Import check are correct, select Import contacts once and wait.
What you should see: MercuryReach completes the roster import and returns you to the contact workflow.
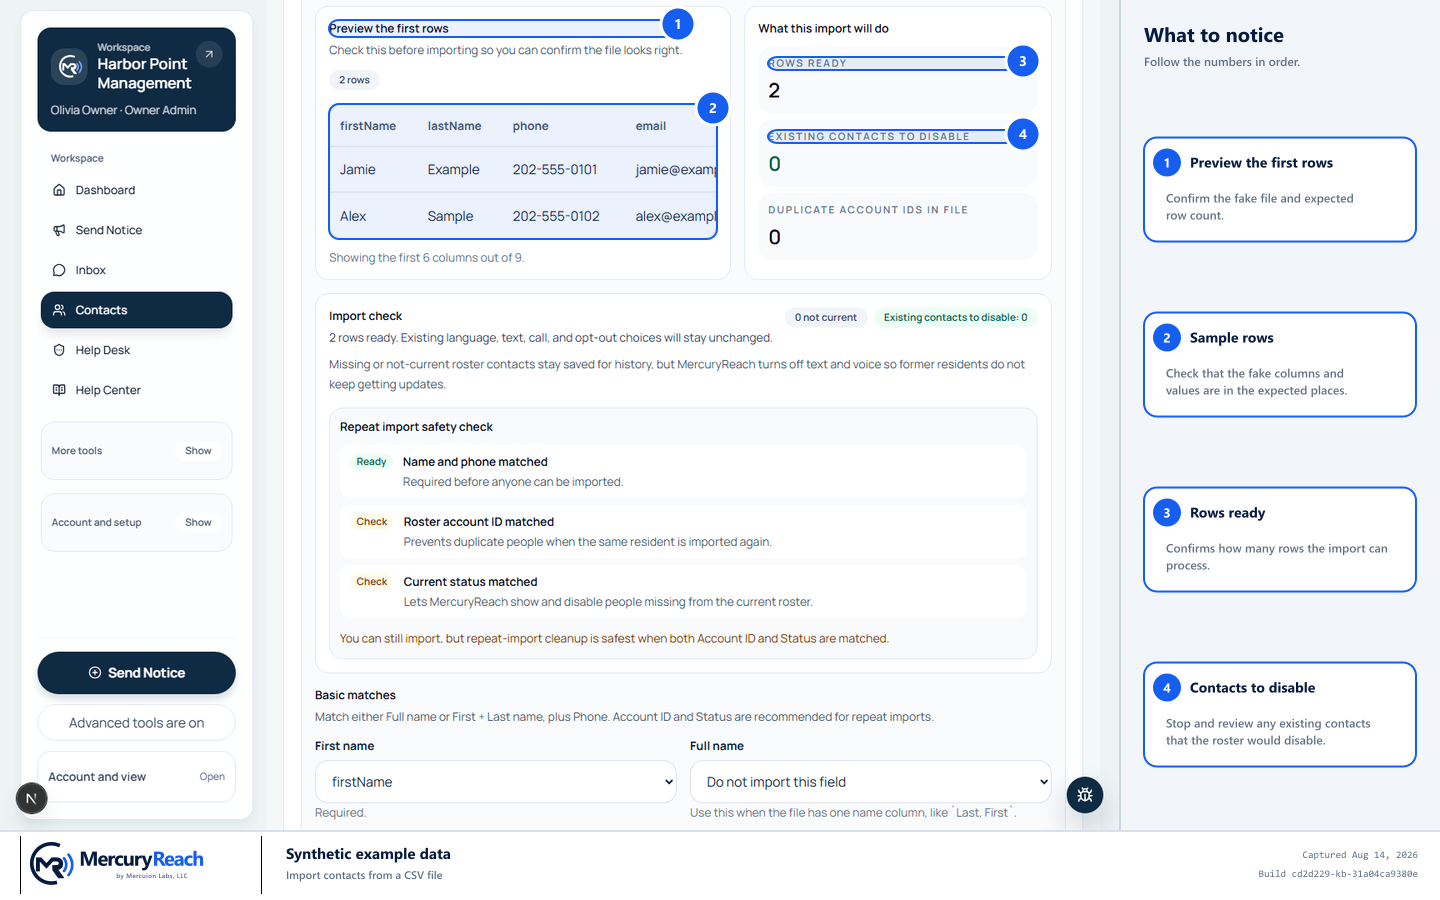
Review the sample rows and roster-impact counts before continuing to mapping or import.
- 1
Preview the first rows: Confirm the fake file and expected row count.
- 2
Sample rows: Check that the fake columns and values are in the expected places.
- 3
Rows ready: Confirms how many rows the import can process.
- 4
Contacts to disable: Stop and review any existing contacts that the roster would disable.
MercuryReach training image · Synthetic example data · Captured 2026-08-20
On a phone
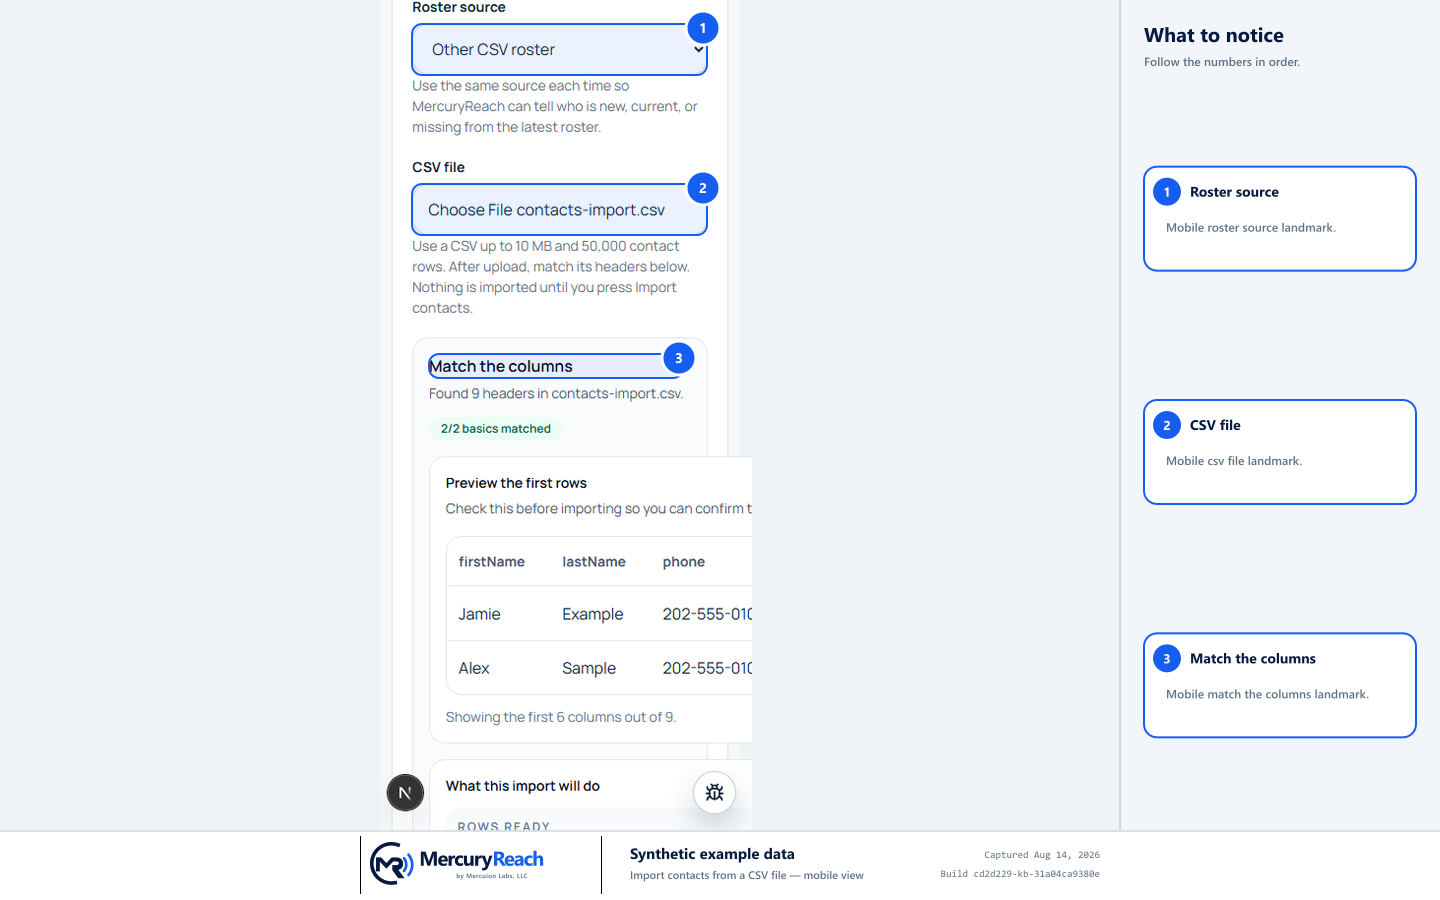
On a phone, choose the roster source, upload the approved CSV file, then match the columns.
- 1Roster source
- 2CSV file
- 3Match the columns
MercuryReach training image · Synthetic example data · Mobile view
Check your work
- Rows ready and Properties seen matched the approved file scope.
- Any Existing contacts to disable count was explicitly reviewed.
- A sample of imported contacts has the correct property and consent.
- Temporary copies are handled under your retention policy.
If something does not look right
Import check is unexpected.
Do not import. Recheck Roster source, column mappings, the source file, and whether it is a full current roster.
The import appears stuck.
Do not press Import again. Wait, check the Contacts list in a new tab, then contact the Help Desk with the time and file row count—not the resident file itself unless securely requested.